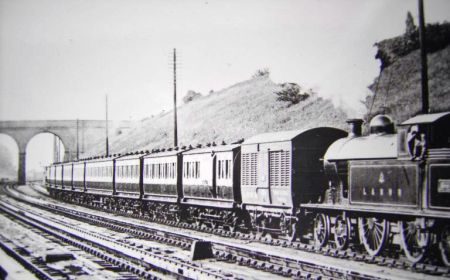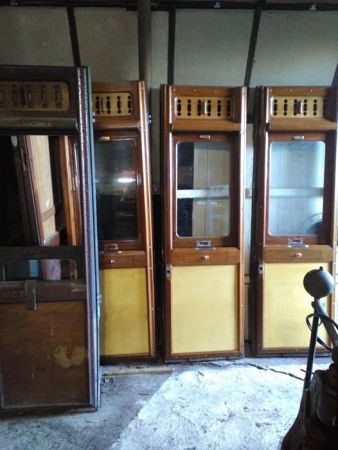
LNWR Picnic Saloon 182BODY
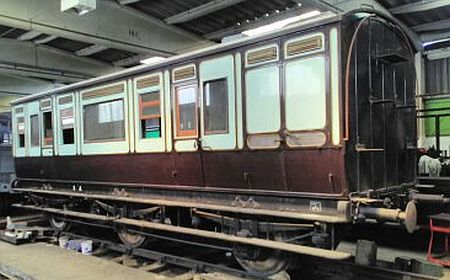
We were fortunate that our body was structurally sound and complete. One side had been facing a cricket green and suffered from cricket ball damage. It had then been protected by wire netting stapled on, so in the end we replaced most panels on that side and about four panels on the second side. "New" panels were obtained first from our stock of spares, but the long lower panel had to be new. This is a single piece of 3/8in thick solid mahogany two feet wide and over nine feet long. The back was painted with PVA and hessian applied to resist splitting, just as Wolverton Works had done when it was built and we obtained professional help to fit it! After seeing what happened to other restored carriages, we did not use plywood panels at all, but a few were machine made from narrowed boards with tongued and grooved joints. Most beading was salvaged and no new beads had to be made.
When received, we were missing one door, but Quainton's extensive stock of spare doors provided one which fitted exactly.
Paint was applied in the old fashioned way with many coats, rubbed down between with various grades of sandpaper.
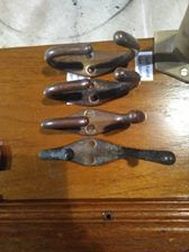
There were no fittings on the body as found, so door handles and commode (grab) handles were salvaged from various grounded bodies. We salvaged a few door stops, but had to make more from solid brass to match the originals which are in pairs, one beng solid and the other having a rubber core. We were very lucky in that of the couple of dozen grounded bodies broken up over the years, just one had a pair of destination board brackets which we were able to use to make a replica pair from brass. When bodies were sold by the railway, metal fittings were generally removed, but we were again very lucky that one body was grounded within the boundaries of Wolverton Works and purchasing it provided a pair of curved end handrails which are a complex shape and difficult to replicate correctly.
ROOF
After stripping the roof of old canvas and many layers of white lead, the boards were planed flat (well, curved!) and painted with primer. At this point the normal process these days is to glue on a waterproofed canvas, but we wanted to do it correctly, as it was done when new. The NRM said it couldn't be done today, so that was red rag to a bull and we applied for, and obtained, a licence to use white lead. Twenty five litres were used, together with 20 metres of 72in wide linen canvas from Kirkcaldy in Scotland, one of the few mills remaining which still makes linen canvas in anything like the correct weight.
The process is to paint the roof with white lead, lay the canvas on, stretch it all round and fix with tacks at the cantrail and at the ends. Following the documented LNWR process, several further coats of white lead were applied including one of white lead and red lead mixed (yes, pink!) which we believe probably served as an indication to the railway that the roof was wearing and needed a repaint.
Gutters were screwed on, and new end strips which we had in our spares stock (as one does!) and holes cut for the torpedo ventilators, gas lamps, water tank fillers for the lavatory compartment and the rooflights in the luggage compartment.
The rooflights are 1in thick pine and were carefully stripped and rebuilt retaining the original glass. Our understanding is that if the glass had to be replaced it would need to be safety glass which would be a different colour and look quite different.
UNDERFRAME
Stripping the underframe took a very long time, needle gunning to bare metal, repairing where required and painting. We also undertook a careful analysis of holes, checking what every one was for and only then welding up any we were confident were not contemporary with its use under a carriage body.
The centre wheelset had been removed many years previously. A contact inside Wolverton Works located an accommodation diamond-framed bogie which was rarely used and we bought it for the axleboxes. New springs were purchased at considerable cost and all the spring hangers and auxiliary spring housings which had been long lost were made new and fitted with new rubbers.
Originally our carriage had Mansell wheels but these had been replaced by steel wheels and of course we had one pair missing. We knew that Wolverton Works had three axles of Mansell wheels but they would not sell them. One day we heard that the Works Manager had been replaced and later that week a lorry arrived at Quainton with three axles of Mansell wheels, free of charge! Later, Wolverton collected the wheels from us, pressed them off their axles, re-profiled the journal ends to match our axlebixes, re-pressed the wheels onto the axles and returned them to Quainton together with two helpful chaps from the wheel shop who fitted them for us including lapping in the bearings. Wolverton Works was a wonderful help to us at that period, thanks largely to their Wheel Shop Foreman the sadly missed Bill West
The screw couplings were non-original, but at the time the Bluebell Railway were updating the couplings on their LNWR Observation Saloon to a later spec and kindly donated the correct LNWR couplings to us, and they fitted perfectly.
When our underframe was converted for use beneath a van, the gas cylinder supports were replaced by a pair of simple angle irons. The correct supports are 2in angle and curved around the 12in diameter cylinders. By great good fortune, the K&ESR were rebuilding their LNWR 30ft 1in Inspection Saloon for electric lighting at the time, so we arranged a swap of brackets which saved us a great deal of time and money.
Quainton Road has a contemporary LNWR 30ft 1in Brake from which we borrowed a footboard bracket and had a complete new set fabricated. The Footboards themselves are made from scaffold boards which happened to be exactly the right size, though the various flaps and shapes in them took some care to replicate to match the Wolverton drawing. Lower footboards were removed (from 1900?) but we decided to fit both upper and lower because from track level they make it so much easier to get into the carriage, especially when one is less agile than in years past.
The only brakes on the underframe as bought were a simple handbrake which we removed and have yet to install the correct vacuum brakegear.
Finally, all LNWR carriages had 1in thick rubber blocks located between the body and the underframe, to provide insulation from noise and vibration. We had a new set made.
RESTORING THE INTERIOR
The Trust has always tried to do things in a methodical manner and so the interior was left in the first years. Due to problems brought on by others work halted on the Saloon for several years, only restarting in 2015.
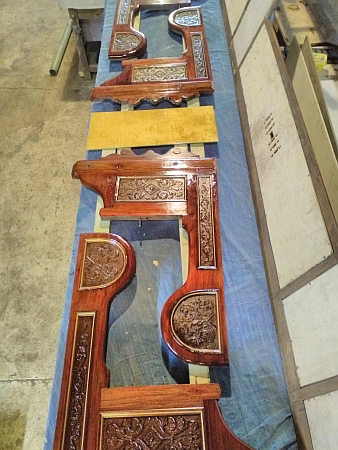
The panelling was covered in old French polish which had deteriorated with the passing years going into hard lumps which had attracted dirt and dust; there was evidence of woodworm activity, some of it fresh, in the softer woods, one bench seat was entirely missing as was one more seat end, the floor lino was very badly cracked into small irregular pieces and the ceiling patterned covering had been repaired with nails were it had sagged due to a historic roof leak. In the early years a distant member had offered to make two new seat ends and had taken one as a sample. Unfortunately, when the Trust found that he had died they were told that all his wood had been disposed of! A detailed photographic survey was made of the entire interior before any work started.
Careful study of the panels revealed that they were all screwed into place, that several had been distorted by damp, that other things had been fixed to them in places and that the woodworm found them attractive! With the aim of a high quality restoration replacement was the best option.
Fortunately, a GA drawing (General Arrangement) has come to light which reveals that the panelling is birch and the mouldings are teak so a programme of replacement was formulated. The advice from a furniture restorer was that French polish is difficult and time consuming to apply to any degree of quality and that we would be better off using a modern varnish which would also be better for the way the Saloon would be kept and used.
Whilst solid birch panels may still be available the easier and cheaper option was to use birch faced ply sheet at around �65 each. Each piece has been cut to fit its location keeping the flow of grain in the correct direction. They are fixed in place after being stained and varnished separately to avoid tell-tale brush marks.
When the old panelling was removed from the first end we discovered that these birch panels were thin ply backed by old LNWR pictures beneath the end luggage racks mainly of views not previously known to collectors. Each had been cut to fit the space so we have one of a Victorian or Edwardian pier without a location title! The second end was finished in the same way but not the side panels which had thicker birch sheet.
It was found that there are many small pieces of moulding trim much of it fixed with amazingly long pin nails of up to 1.5 inch length. Most nails prefer to stay in the wood frame and so pull through the mouldings often breaking them in the process of removal!
SPARES STOCKIn the early years when the Saloon was first rescued the countryside was seemingly 'littered' with coach bodies often of a similar saloon type and the opportunity was grabbed to recover as many smaller parts as possible which has resulted in a wonderful stock in which to seek suitable parts to replace those that are twisted, damaged or in otherwise poor condition. Sometimes they need trimming to size. For future restorers each is marked on the back that it is from spares stock. Spares stock includes an upholstered corner seat frame and the remains of two bench seats which are proving very useful in the re-upholstery.
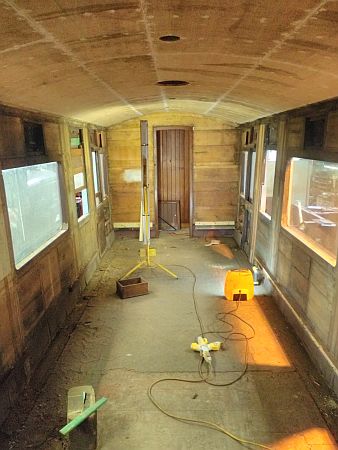
THE CEILING
The ceiling had a square based repeating pattern paper that was thought not to be original as surviving photos show a convoluted flowery pattern. Research with the modern day Lincrusta company has revealed that this pattern was introduced to the world at a Geneva trade fair in 1921. Bearing in mind the roof leak distortion the decision was made to replace the ceiling. The original Lincrusta had been fixed to a board that resembled a cross between cardboard and hardboard and all of this was replaced with a modern 3-ply sheet cut into 2 foot wide panels and held on with 850 screws in a style very similar to the old ceiling. But why had the ceiling been replaced?
We now believe that there had been a fire in the Saloon towards the end of one bench seat which caused a long term roof leak and a replacement ceiling. On a typical British summer's day it can be quite cold, even wet, and with the Saloon in an isolated siding it lacked heat. If you tip out the ice bucket and pop in the serviettes, maybe a newspaper, too, and apply a match the flames could catch the seating and ceiling scorching the panels on the way. With only a soda syphon or two as fire extinguishers you have a problem.
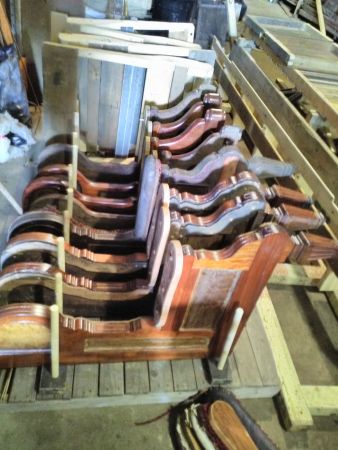
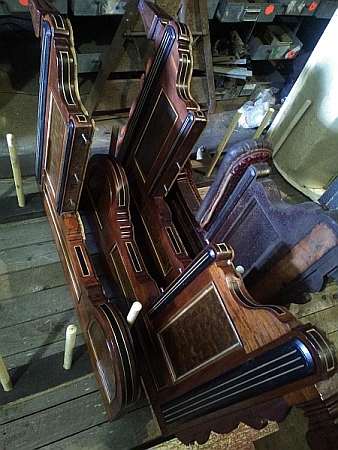
THE SEATS
One 13.5 foot bench seat and a seat end needed creating. Comparison with the GA drawing showed that these need bulbous heads and ours didn't have them but marks on the walls showed they had probably been removed when the body was sold out of railway service. So, where do you get new ones? Well, we started with our spares stock and found four single and two double back to back seat ends which, after attention with a circular saw became eight singles - four each left and right handed - just what we need. They are from different vehicles and have slight differences in design finish but they get us out of a big problem. The five old, cut down ends have been kept.
There was a lot of time spent cleaning these seat ends four of which still had their railway upholstery attached. Three have been cleaned of this with the 4th kept as a reference for Ken, our upholsterer, but will follow in due course.
Seats need a suitable finishing material, known on railways as moquette, a particularly hard wearing material. We knew the design we wanted but minimum orders at the mill would give us enough for six or eight coaches, if we could afford it. Eventually, a friend at the Midland Railway Centre, Butterley offered the three rolls they had and one of us had a sleeping car style tip-up wash hand basin and we had a deal!
GENEALOGY
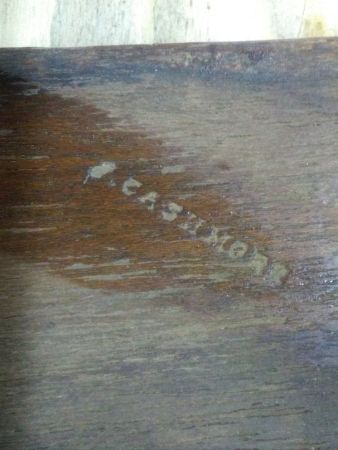
At various stages during the interior work surnames have been found. The most common by far is Hickson though Arnold has also been seen. In one place it is Hickson & Arnold though neither is listed among the known staff at Wolverton Works which probably shows that the records are, as yet, incomplete.
THE CURRENT POSITION - MAY 2018
The ceiling awaits papering - any offers? We have purchased a reasonably close look-a-like modern embossed paper with a flowery pattern as it hasn't proved possible to either design or make a correct original pattern. It's a good second but would be relatively easy to replace if a better version became available.
The restored wall panels have been trial fitted mainly to ascertain the exact design and positioning of the new seat backs. All have been returned to our workshop for final checks and finishing.
The seat backs are going through the upholsterer's skilled hands.
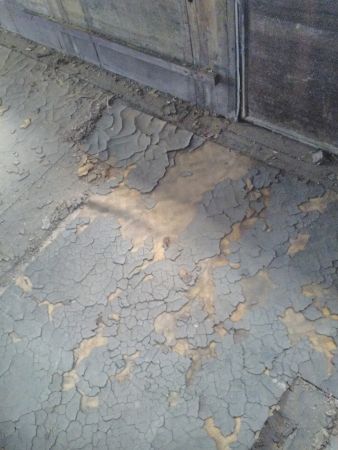
The heavily patched remains of the old lino have been disposed of with one square yard section kept for reference. The floor has been cleaned of around 300 nails.
A large number of smaller pieces of mouldings and trims are at different stages of being cleaned and varnished with three coats to give a pleasing finish. The seat ends await their last two coats and refitting of trims and beads which are being worked separately. Each bead is being predrilled for its pins to avoid splitting of this old, dry wood. A numbering system being created to ensure all fits together later.
All the seat bases and the entire 'bare bones' interior have now had three coats of wood worm & rot preventer - more than four gallons @ £23/gallon.
JUNE 2018.
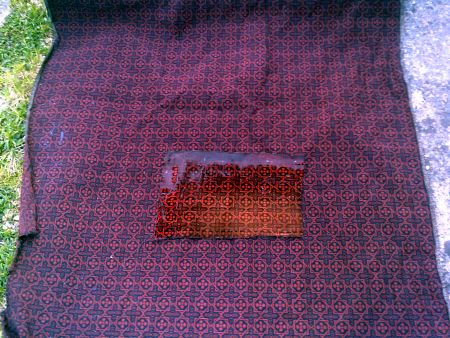
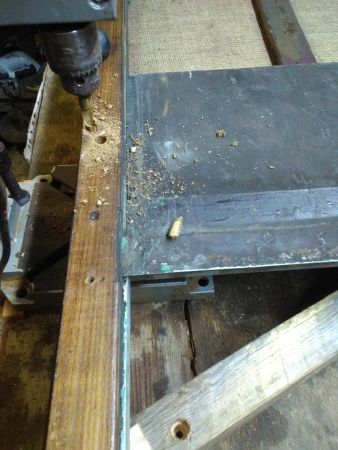
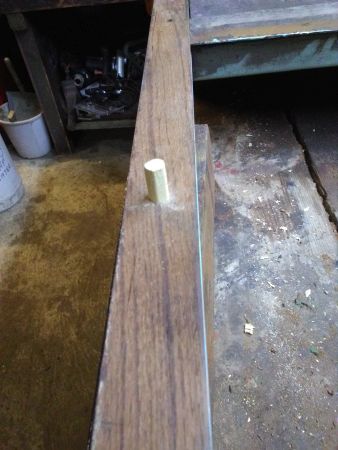
can you see the repair?
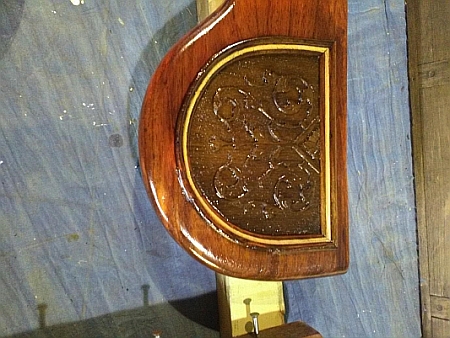
Seat ends. Work this month has concentrated on reassembly of all 64 strips of beading back onto their seat ends. There will be eight in due course but one has been set aside as a source of information for our upholsterer, Ken, as it still has original moquette attached. This wonderful source of information is being retained, in its ex coachbody condition, for the time being. Once Ken has started on the seat ends then this, too, will be stripped and restored though some parts have already been removed for cleaning.
The other seven seat ends have now had their moldings and beadings re-fixed, a fiddly and time consuming task which for one seat end was particularly tiresome as there was a 1.5 inch section of curve missing altogether. After cutting tapered slices of spare straight section and gluing into position there then followed a careful sanding to lose the edges. Pleasingly, when someone came to view I couldn't find it straight away. Before re-fixing with 1mm veneer pins each piece of bead was drilled with a 1mm dremel drill to avoid the 130 year old wood splitting, only on one short piece this didn't work but filler hid the split. The drill holes were all made in the part where the gold line sits so that each nail head could be hidden. All seven have now been varnished in an attempt to seal and protect everything.
The unrestored sample on the right
Upholstery. Ken is progressing nicely (and rather fast!) with the new upholstery and the two long bench seat backs are back in the store awaiting the supply of buttons to arrive. A dust sheet loosely covers each one.
Luggage racks. Attention is turning to the creation of luggage racks. As we have no spares or photos of these (only screw holes) a search in LNWR Society and other archives for photographs has established that none can be found so a research trip to the NRM is planned. There are a considerable number of drawings at York that appear, in their description, to be useful. We think we know the shape is the same as that in the Dundalk, Newry & Greenore Railway coach in the museum at Cultra, Northern Ireland as the DN&GR was owned by the LNWR but a drawing is needed to have a pattern made.
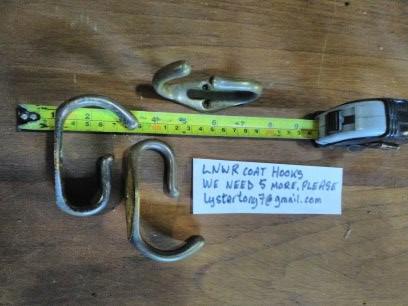
Coat hooks. We are still on the lookout for five more coat hooks to match our existing three. If needs must we could use one for a lost wax casting but it would be great to find an original. It is also possible that a drawing will surface at York.
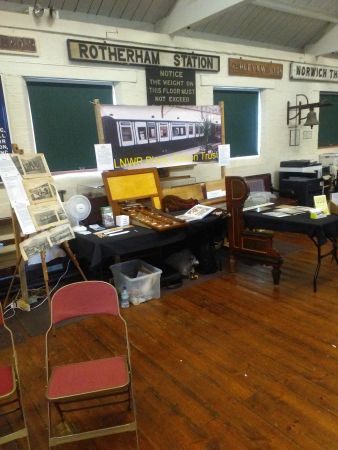
Back at the turn of the year I put our name down to attend the LNWR day in July at the Kidderminster Railway Museum which is very good - have you been? We had a good day and it gave us the opportunity to showcase some of our work, talk to people and raise a few much needed pennies. Somewhat inevitably, a photo doesn't do the view justice as the background gains more prominence.
SUMMER 2018.
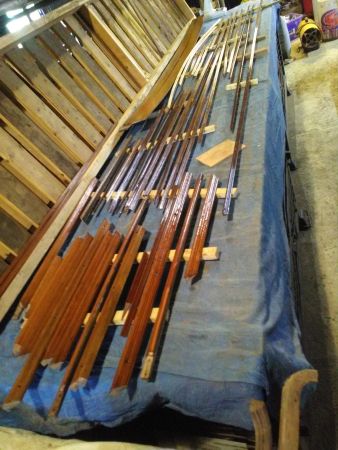
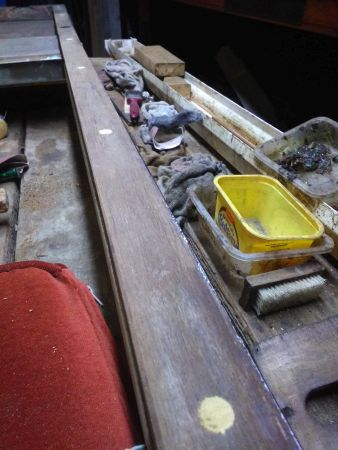
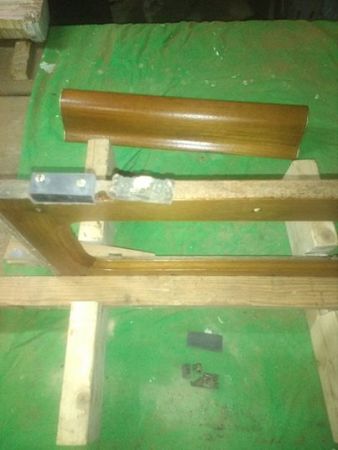
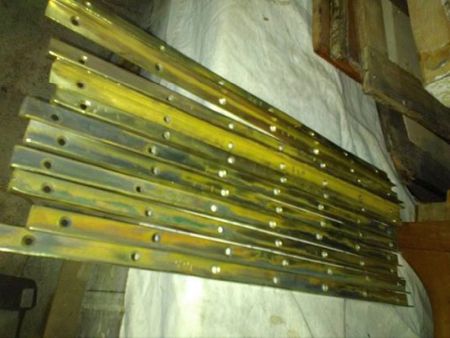
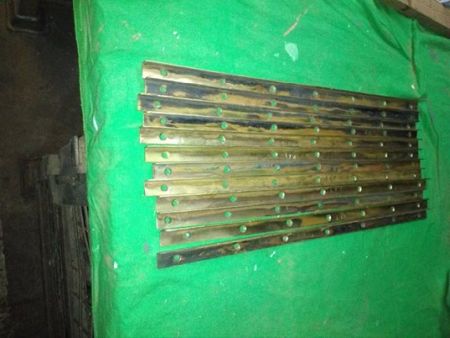
Work this summer during the excessive July temperatures of 35 degrees C and more has included the cleaning of as many of the small mouldings used as possible in preparation for the later refitting. The mouldings are essentially triangular having been cut from mahogany and are no more than 8mm thick. The hypotenuse side is carved lengthways in 3 grooves. As much of it was held on with up to 2 inch pin nails and it is at least 90 years old a lot of it snapped on removal so it is of varying lengths of up to 11 feet long. I added some pieces from our spares stock to try to ensure there will be enough. Along with some thicker, window, mouldings these have all now received 3 coats of varnish, each rubbed down between coats and the over-run and drips sanded off the backs to allow easy re-fitting. Here they are laid out on sacrificial strip wood to help the drying process, as well as any drips (on right).
The curved pieces at the back are for the end panels where they meet the curve of the ceiling across the Saloon.
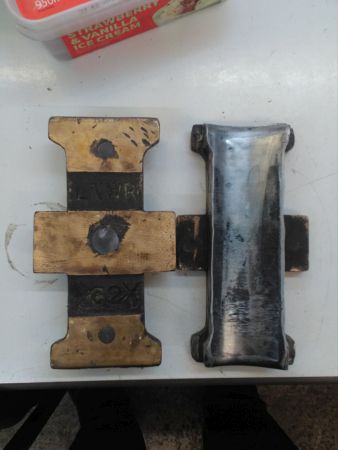
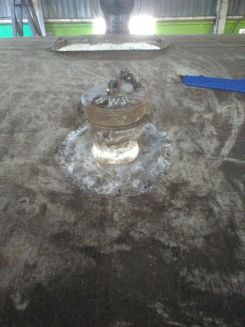
As always we are trying to plan ahead and spot any potential areas that may cause delay either in preparation or in supply of something by an outside organisation. Sometimes, it's a matter of grabbing an opportunity when someone is doing something and so it was that the centre axleboxes were removed back in February for examination by Quainton's Engineers. These have been an area of concern for some time because the boxes are too small for the hornguides (known incorrectly in this case by some as W irons) and so fall sideways a bit. The excessive play isn't more than a couple of inches but it's enough to require a modification. Having removed the bearings it is obvious that there are problems to resolve here, too, in time but for now the bearings need their white metal sorting out. Our good friend, Dave Horsley, kindly took on the task of sorting out the whitemetal and they have now returned. In the photograph one is upside down - the one on the left has LNWR deeply cast into it.
When the underframe was recovered from Wolverton Works all those years ago it was missing a centre axle and the then Works Manager, the late Bill West, didn't like the axles they found for us and had the wheels pressed off and pressed on to new Mk1 axles which were then turned down to the correct size for us - all at no cost to us!
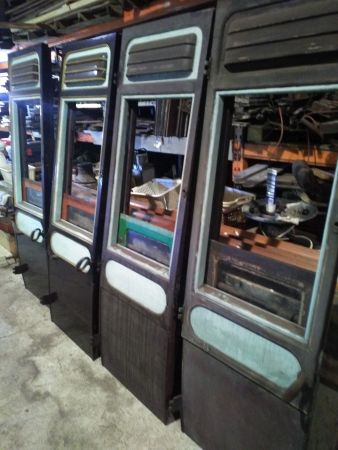
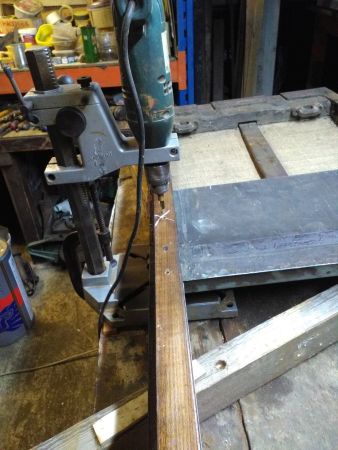
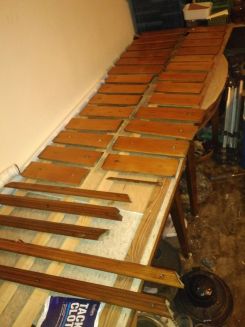
Towards the end of that very hot July where temperatures frequently climbed to over 35 degrees C, even with a fan running, we removed the four passenger doors, as distinct from the double luggage doors. As anyone who has ever lifted a LNWR door knows, these are heavy things and require two strong men to assist whilst a third removes the three hinge pins. The interiors of all four need stripping of that French polish and varnishing with some wood replaced. Here are the four doors lined up against a bench in the workshop. The first door was misguidingly simple to dismantle with only one of the 15 side screws breaking off - I thought that I might "get away with it" if I just glued the head back in position later! As the first door was being reassembled and parts in wet varnish were drying a start was made on the second door where no less than nine of the fifteen screws all broke off - core drilling out the old screws and finding replacements was now needed and part of the process is shown here. In the last of the next five photos you can see the line of plugged holes.
Work on the overhaul of the doors is best done with the door lying flat as I can get the best purchase with screwdrivers on stubborn screws against a solid surface rather than one that might move whilst working off a ladder or steps. If I don't dismantle everything there will be corners that I cant get into and it will show when all is reassembled and back in the coach. It also makes it easier to put things in baths of Gunwash to soak the old French polish for 10 minutes. Gunwash is a chemical available to the trade and is a nasty mixture of Toluene and Methanol with a pungent, acrid aroma which needs using outdoors or in excellent ventilation and with suitable ppe (personal protective equipment)
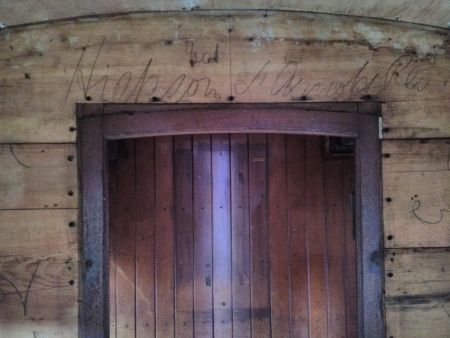
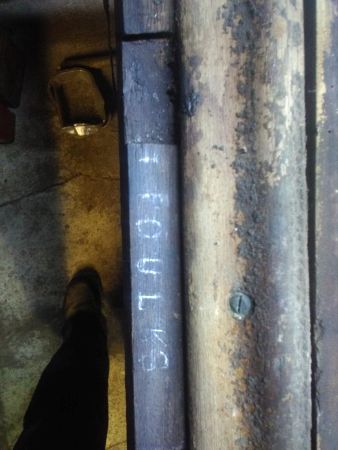
All this dismantling has produced a growing list of carpenter's names. Interestingly, we have only found the odd name across the Saloon but the doors are covered in them. One possibility, created by the occurrence and their locations and backed by some, so far, limited research elsewhere, is that these names date from the 1920's rather than construction in 1894. We now know that there was a fire in the Saloon because of the fire damaged frame timbers in one corner. As the ceiling covering was introduced to the world at a Geneva trade show in 1921 the supposition is that something caused a small fire and traffic was such that it was worth restoring the Saloon and by this time carpenters were putting their names on their work which was made on benches away from the Saloon. Why? Well, there are two possible reasons - it could be to identify who made a particular piece so that if during assembly your work doesn't fit they know who to blame but it could also be to prove how many items you have made this day or week if you are paid that way.
Here are a sample of the names found. The first one has two names with the second partly illegible.
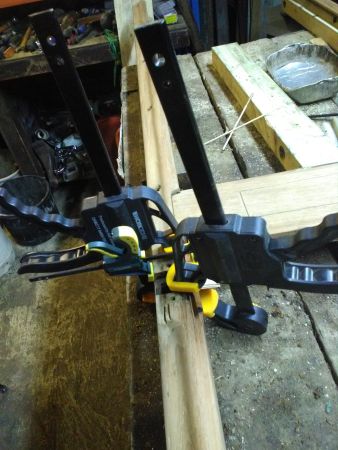
Sometimes broken or damaged wood is found though it often isn't noticeable until its been through the Gunwash bath. This can be particularly frustrating if the item first appears to be in good condition but, after cleaning, is found to be heavily damaged as has happened with the long window cill mouldings which have upturned curving ends. Frustratingly, all our spares are of different lengths but with similar damage so it is possible that some sort of mosaic will need to be attempted, though I have just thought of one other place to look for some spares - we shall see!
This photo on the left shows part of a door frame where there was a split after glueing and clamping overnight. Normally, I would add to the strength by drilling a small 1mm hole with a modeller's dremel and inserting a veneer pin. I pre-drill holes against the 120 year old wood splitting. Unfortunately, in this case the split is just above the top edge of a slot for a new panel to be slid in.
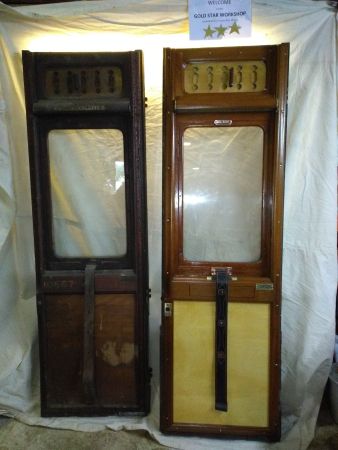
The photo on the right is of the first door fully restored stood in the workshop next to door three which is, as yet, unrestored - a 'before & after'.
AUTUMN 2018.
At long last we now have three doors completed with just one to go (on the left). Frustrating complications have included three screws that snapped off as they were being put back in so new ones were tried and, yes, the second one broke off, too! Currently, the fourth door has been taken apart and is in the process of being stripped of old and very lumpy French polish then sanded in preparation for varnishing at home, where it is warmer. The curious may like to know that there are in 51 screws to undo, clean, maybe replace and refit in each door
On the inside of a carriage door is a sliding piece of glass (the droplight) which is lifted using a leather strap. To reduce the vertical impact of the droplight against the bottom of the sliding vent there are a pair of rubber blocks. As can be seen in the first photo these needed replacing as they were more dried up and wizened than you would believe possible. (The varnished 'bar' behind is the blind box) In the second you can see the reassembled vent with the empty blind box (we will fit blinds one day...) screwed back on just behind. The whole assembly is seen upside down here.
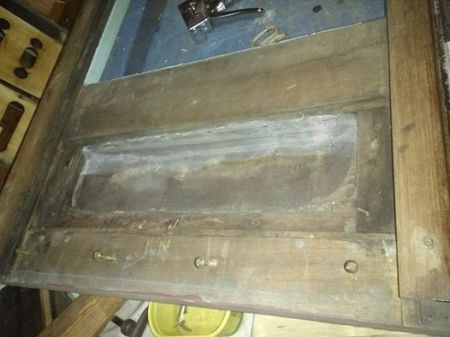
On the outside of a passenger door and at the top above the droplight is a vent cover, or bonnet, which allows for a modicum of ventilation. On the inside is a sliding wooden vent, often decoratively cut. Between the two is a largeish void through which little insects can enter the carriage and to prevent that the old companies fitted a gauze mesh. Now, as it happens, I have some new gauze mesh and here it is fitted, with a modern staple gun, before it was painted black.
It's one of those jobs that is important, tedious and the results will never be seen but needs doing. There are six opening windows (known as lifting lights) on the Saloon and they slide in brass runners. Well, all our runners were bent, a bit twisted and some had cracks and all needed attention. Our good friend and Quainton member Brendan very kindly did an excellent job straightening them as hopefully can be seen in these before and after shots. The lifting lights themselves are progressing through the domestic varnishing workshop in between other faster moving jobs.
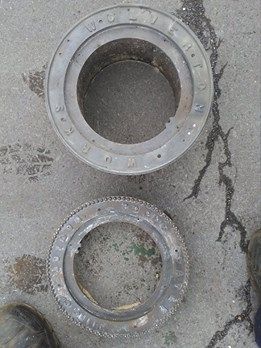
In between other things thought has been turning to lighting and how to represent the old gas lights without using a naked flame in a wooden coach! Whilst no firm conclusions have been reached other than the question 'Do the lamps need to work if only day time running is planned?' it has been decided to make them look correct and we have some parts to help. Here are the before-and-after of two different rings that we shall use. Both are 10 inch diameter and we need a third and then two at 8 inch. When the weather warms up a bit resin castings will be made.
PARTS WANTED
As a reminder we are still looking for some parts to enable completion of our Saloon.
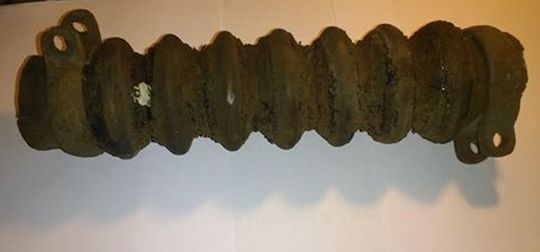
2 x diaphragm gaiters, 12 inches long, 2.5 inch diameter.
4 x coat hooks. We had 3, a man kindly donated 1 and so we need 4. It's a common style, the Southern Rly used it too.
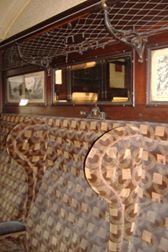
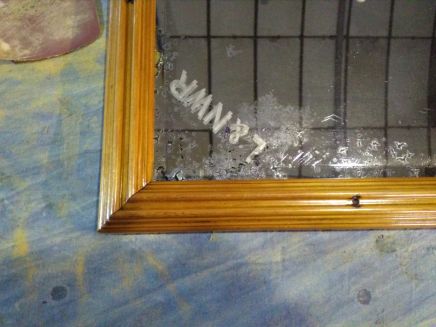
1 x mirror 15.5 x 27.25 inches. this one is in Quainton's diner but it's the same size....
4 x luggage rack brackets in this style, ideally.All offers of help gratefully accepted - as it will be good to have a complete vehicle.
Who built our Saloon?
We know it was built at Wolverton Carriage works in 1894 as part of a batch of a couple of dozen but we don't know the names of the people involved, where it operated from, whether it moved around the system much, how often it was used, etc. We know it was sold out of sevice in 1934 and we know that it suffered some internal fire damage, probably around 1920. We know this date because we have been told that the non original ceiling paper was introduced at... a World Fair in Geneva in 1920. This suggests that the fire which damaged down to the framing (so got going a bit) wasnt severe enough to write the coach off.
Seven different surnames have so far been found in various places. Initial research around only the first name by a professional suggests that the name is better linked to the 1921 census than the 1890s which points to a very extensive overhaul post fire damage although one shouldn't jump to conclusions. Will we have similar results for the other names, possibly pointing to new panelling and doors? Only time will tell.
Do other coach overhauls find as many names?MAY 2019.
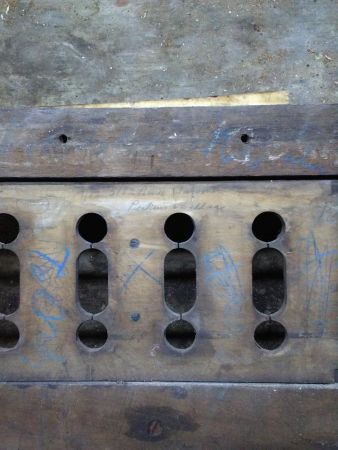
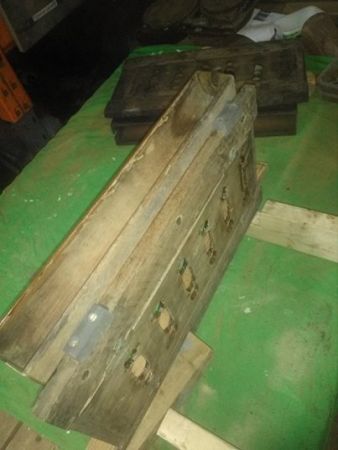
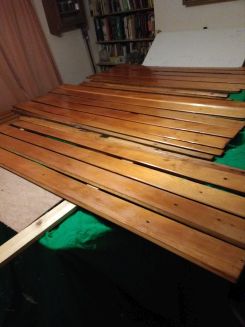
At first glance work has slowed somewhat over the winter and early spring period because much of it has been the laborious unscrewing, cleaning, varnishing and reinstatement of the interior decorative wood panelling in the WC area. Only 30 inches wide the room contains 106 planks of pine varying in length between around 10 and 72 inches in length held in place by 259 brass screws. To aid reassembly each plank was numbered. Then there are the two water tanks and so another 40 planks and 80 screws. As before with the cooler winter temperatures varnishing was done at home but only 27 of the longer planks could be accommodated at a time. The tanks presented their own problems in that we were using planks recovered from a similar picnic saloon 20 years ago and, in the rush of dismantling, no record was made of what the finish was where the verticals meet the horizontals. This was solved using spare window mouldings. Only during reassembly did it become obvious that these recovered planks are 2mm narrower than those on the walls which makes a difference when lining things up! Interestingly (in some minds), the wall planks have a V shaped edge whilst those recovered from another body to hide the tanks have loose tongues.
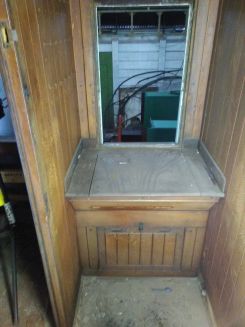
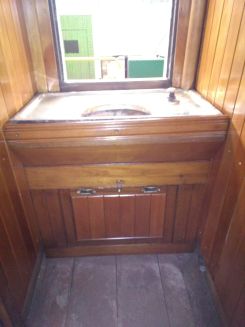
Another difference is that we only have one tank and that was configured for the lavatory pan. In line with modern H&S requirements for belly tanks for effluent on carriages and Quainton's relatively short run the decision was taken not to fit a lavatory pan but to reconfigure the outfall to supply the wash basin. We don't intend to fill our tank or to use our basin but, well, you never know, maybe a film producer might fancy a shot of his star washing her hands... Luckily, we have just one roof mounted tank filler so the basin will be plumbed in.
The basin, again recovered from another body, was found to respond spectacularly well to silver dip to clean off the years of black grime though the rotten egg smell kind of lingers in the house! Currently (early May), the lavatory pan area is being rebuilt to form useful storage but with the outward appearance of the real thing. This will be followed by reassembly of the basin area opposite though a dry run has been made using two panel pins and gravity.
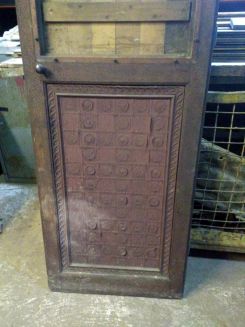
The whole WC room, like the luggage area at the opposite end, is accessed via an internal door. These doors are plain panelled on the room side but carry a poster above a square repeating patterned material below as seen from the Saloon area. We are really not sure quite what this pattern material is made of but it's not thought to be Lincrusta which is usually made of plaster. Our material is dark brown throughout and just might be papier maché formed in a press. Whatever it is it needs remanufacturing as it doesn't like the damp it's had over the years and Mike has offered to try his best with it.
PARTS WANTED
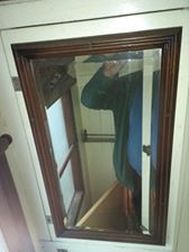
Last year we appealed for help in sourcing a suitable lavatory mirror. Though we were unsuccessful we tripped across a rescued one of precisely the correct dimensions in one of Quainton's stores buildings and we have restored its frame deciding, at least for the time being, to leave the degrading silvering as it is. It does, of course, carry the company initials etched onto the glass at a 45 degree angle.Also on our appeals list were four coat hooks - a gentlemen brought in five he had used to hang dog leads on! We have had no luck with diaphragm gaiters and currently await quotes from two potential sources. We are still looking for four luggage rack brackets.
It is pleasing to see that the only area left to start within the coach body is the luggage area. This needs stripping and re-scumbling and, with luck, should be relatively quick. So with this in mind, the Trustees have agreed on a vinyl pattern floor covering. We know from previous attempts that we can't get "our" pattern replicated due to copyright issues so a near miss is to be used and a sample is currently awaited. In an ideal world the ceiling will be papered first (another near miss design which is in stock), some of the panelling reinstated, the vinyl laid followed by the seating - time will tell!
APPEAL FOR FUNDS!
Well, it had to come one day. We have had a quote for lining out the exterior of our Saloon which is way beyond our means. We need to find a good amount of funding - can you help, please? Any amount will be very gratefully received. Please see the how to donate page. Thank you.